Sunday 1 September 2024

Tremendous Tomato Pie


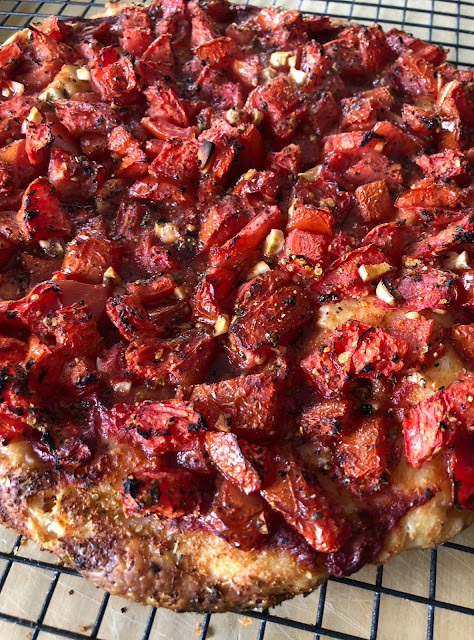
This is Tremendous Tomato Pie.


Here are some images from our backyard garden to the table…


Waiting for harvest time… the yellow and cherry tomatoes are almost ready to be enjoyed!


The first cherry tomato… of many!!


And suddenly, it’s time to make Tomato Pie.  
Time to harvest MY OWN TOMATOES and make a Tomato Pie that’s almost 100% HOMEGROWN. I proudly grew and tended the tomatoes in the topping, the 5 year old sourdough starter, and the basil… that is something, for this fledgling urban gardener.

Now I know I have a lot to learn about food photography and the like, but I can follow a recipe… and this isn’t just anyone’s recipe.  It’s Laura Vitale’s Deep Dish Tomato Pie recipe.

Why use someone else’s recipe?  Because it is PERFECT just the way it is.  I wouldn’t change a thing.

I get sooo much inspiration from other food bloggers, writers, and YouTubers.  To be honest, I may start with their recipes, but I give credit where it is due.  Remember, I started this blog to share family recipes, the tried and true recipes, and recipes that I make and tweak and LOVE… and those recipes do change over time, as my cooking style changes.  What comes after that, I may well share… in this tiny humble blog…  from my tiny home kitchen to yours.  

And sometimes, I will just share them just the way they are, like this incredible recipe for Tomato Pie.  I hope you enjoy it as much as we do, every single time, and are inspired in your own way.


This Tomato Pie makes everyone who tries it moan with utter delight.  Yes, it’s THAT GOOD.  
Thank you, Laura!!


I will also say that the crust was made by yours truly, and it’s almost exactly the same as my tried and true sourdough pizza recipe, except that I added a little yeast (5 grams) to the dough mix, as my starter is a little on the lazy side this summer, since I haven’t been using it to bake my sourdough loaves as regularly as I normally do. 

But now that my very own homegrown tomatoes are ripe, I KNEW it was time to make Laura’s Tomato Pie again, and it did NOT disappoint!  It was even sweeter than when made with only red tomatoes, and it’s been a GREAT season for fresh tomatoes this summer.


The recipe for Laura’s Tomato Pie topping can be found here: https://www.laurainthekitchen.com/recipes/deep-dish-tomato-pie/

DO give her a follow - you’ll join the other 4.5 million or so other subscribers that subscribe to her amazing YouTube channel at Laura in the Kitchen.

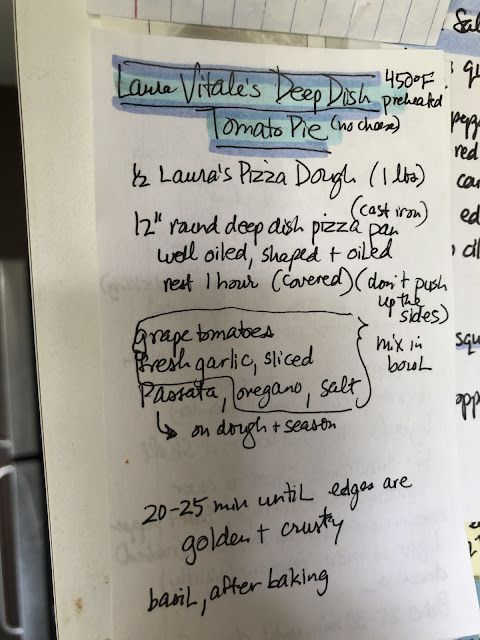
Here are my notes from her recipe:


Basically, you just toss grape / cherry / yellow tomatoes in a bowl with freshly chopped garlic, s+p, oregano, and olive oil.  I use my heaviest, ceramic coated cast iron frying pan.  Gurgle a generous amount of olive oil in the bottom, and press my pizza dough into it (let it relax and gently spread it out like a foccacia a few times).  Then I slather it with tomato paste (or pizza sauce), season it with more salt and pepper and dried oregano / basil, and spoon the seasoned tomato / raw garlic mixture over it all.

Bake it in a preheated oven at 450 degrees Fahrenheit for 25 minutes… it smells AMAZING and comes out perfect every time!!!!!!!!!  Let cool and BE SURE TO TOP WITH FRESHLY CUT BASIL (not always pictured - I don’t add the basil until it’s properly cooled).

I’ve made this incredible recipe FIVE TIMES already this summer, due to popular demand.  It’s a gem.  Thanks, Laura, for this summer’s Best Recipe!  It is MUCH appreciated.

Some process pictures, for your enjoyment:


Tastes tremendous.  Tastes like Summer.  Tastes like Love.


Check out my go-to recipe for the crust… it’s the same as my Homemade Sourdough Skillet Pizza recipe here:  https://tastethelovebymj.blogspot.com/2020/05/homemade-sourdough-skillet-pizza.html

Be sure to check out my upcoming salad recipes and composed plates / bowls of yummy food I’ve been cooking and eating lately.  Likely the posts won’t be so long or the recipes so technical… but that’s actually how I do my most inspired creating in the kitchen.  

Follow me on Instagram or Facebook:  MJ Schropp 


Friday 30 August 2024

Old School / New School Cook and Foodie


It’s TIME.

Time to dust off the blog, and start posting again.  Where’ve I been?  Let’s just say LIFE has been happening, in many of the hardest ways, and it will continue to do so… but COOKING and writing and taking photos… they make me HAPPY.

I’m not big into sharing personal stuff on social media, I guess I’m weird that way, but also I’m super busy, and take lots of photos of my food… I have for YEARS.  But then I just share them with my mom or friends, who also like to cook or bake or eat as much as I do, lol.  I’m generally a very private person.  But food is my PASSION, and lately, I’ve been on a bit of a fat loss journey, despite loving to cook and bake and eat both “healthy” and “unhealthy” foods.  We’ll get into that later.

Why the need for weight loss?  I love to eat, always have… and then I started to eat too much, apparently, and I couldn’t stop.  Why?

It was a perfect storm of life circumstances.  I was unexpectedly diagnosed with breast cancer on February 14, 2020, after a routine scan.  It was biopsied and confirmed March 17th.  Removed on April 1st.  I followed protocol, had 16 treatments of radiation to my right breast, and then I was put on a FIVE YEAR course of chemotherapy pills (the name of which I have blocked from my mind) which my oncologist said would keep the cancer away, but also potentially cause the average woman to gain 30-50 pounds.  I was already post-menopausal and battling the challenge of gaining ever so slightly year after year.  It was during 2020 (nuff said?) and that already had me stressed, stuck in the house (except for lifesaving daily walks), and gaining weight.  Then that chemo med from h*ll made me feel SO AWFUL and SO TIRED and SO HUNGRY that the weight literally piled on… and I gained 50 pounds in just a few months!

I felt awful, I looked awful, and I was growing shockingly weaker from lack of movement and the rare side effect of ligament damage in my wrists and feet / ankles.  So I quit that med cold turkey (with halting permission from my oncologist) and I have been trying to take my body back ever since.  That’s not even the long explanation for it all.  

Suffice it to say, it’s time to start writing and posting again.  I won’t always get this up close and personal about my life, but I WILL get up close and personal about what I’m cooking and eating and I will be sharing my food pics on IG and maybe FB to help you find my recipes here.

I created this blog as a passion project, to share our OLD SCHOOL family recipes with friends and loved ones… but the way I cook has seriously and wonderfully evolved.  I’ve been told I’m very creative with how I put things together, but I’m just a gal who loves to eat, in a very small kitchen, cooking for my husband and I, and eating like kings and queens because I cook with that not so secret ingredient called love… and you can taste it.  So join me, as I just jump in and start sharing my latest passion project, cooking NEW SCHOOL style:  simple, balanced, nutrient dense, tasty REAL FOOD, for a healthy and happy life. 

Won’t you join me?


Thursday 12 January 2023

Care and Feeding of your Sourdough Starter, 2023 edition


How do I keep my starter ALIVE?
How do I know if my starter is okay to bake with?
What if I haven’t used it in ages?  Do I have to start from scratch??
What if it’s already dead??

Now that I have your attention… RELAX.

I KNOW it’s been a while since I’ve added to my blog, and I’m getting a new oven installed in less than a week, so I went back to my blog and discovered that I had a pretty good thing going.

So I’m dusting off some of my most special recipe posts, and this one comes to mind, because my starter has been getting pretty lonely tucked in the back of my fridge.  I’m feeding her today, and will probably make some waffles or pancakes with her this weekend.  
(In 2016, I started her and named her Hungry Lizzy, after St. Elizabeth of Hungary - patron saint of bakers)
(Yes, I’ve kept her alive for over 6+ years!!)

SO…. it’s really quite easy.  Just do it.  Feed your starter.  Make stuff with it.  Feed it some more.  Name it.  Get to know it.  A little attention will go a long way!  See?

It takes a lot to “kill” your starter, truly.

But really ... as long as you bake with it regularly (even just once a week), it will be happy and bubbly and ready to lift your sourdough to new heights.  Bake more often than that, and you’ll have a superstar performer on your hands.


You can take a mathematical approach, and actually measure your flour and water, so you KNOW it will be just right. All you have to do is measure equal amounts of water and the flour of your choice.

For example, you could measure 25 grams of water, use it to scrape up and dissolve the dried bits on the sides and bottom of your container.

Then measure and add 25 grams of strong bread flour.  

Mix well, and keep it out on your counter until it’s happy and bubbly and ready to be used.

After awhile, you’ll get a real “feel” for it, and then you’ll be doing it much more instinctively as you gain experience and confidence. You’ll also develop a preference for how wet or dry you like to keep your starter.  I like to keep mine on the thicker side, so I can really see it puff up and double (or more). 


Remember, you’re the one who gets to decide how much starter to keep in the fridge at any given time.  I like to keep only a bit more than the scrapings if I only plan to make one loaf... but if I’m planning to make up some pancakes or waffles on the weekend, or to do a big bake of three loaves in a day or two, then I build it up by a bit by feeding and mixing it, and leaving it out an hour before I pop it back in the fridge, so I’ve got enough to use when I need it.


It’s ready to bake with, when it is bubbly, has more than doubled,  and it is still rounded at the top.


TROUBLE SHOOTING ~

If your starter is a bit sluggish, and doesn’t see to want to grow, consider the following:

Is your kitchen warm enough?  
Put it in the oven with the light on, 
put it on top of your refrigerator, or near a warm spot.

Is there a draft inhibiting its growth?  
Pop it in the microwave or invest in a proofing box.

Did you feed it “enough” flour?  
Add some more!  Or change up the flour (try some rye or spelt)


Happy starter = happy sourdough!


Happy sourdough = happy eating!!


Good luck and HAVE FUN!!!!

MJ


Wednesday 2 December 2020

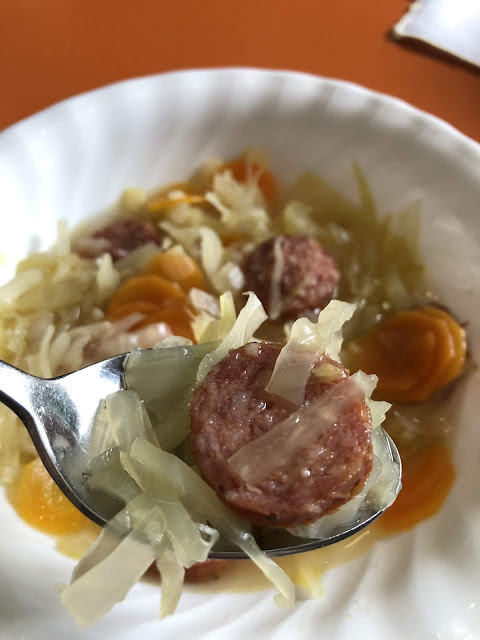
Mom’s Russian Cabbage Soup


Mom's "Russian" Cabbage Soup 


Sauté 2 chopped onions in lard (or other good fat) til almost glassy.

Add a stalk of chopped celery, cook for 2 minutes.

Add 7-10 cloves chopped garlic, stir 1 minute.  Season well with pepper, easy on salt.

Add 2 chopped carrots, and roughly chopped cabbage and stir to ensure it is coated in the fat.

Add chicken stock (or just water) and bring to a boil.  I just add enough liquids to cover the cabbage.  For an easy boost of flavour, I stir in a heaping teaspoon of Better than Boullion (chicken) and it turns out great!

Finally, a 2-4 sliced SMOKED German sausages, and simmer until the smokiness from the sausages can be smelled, and the cabbage still has some bite (but definitely not mushy).  Taste to season, if necessary.  

The key to this soup is to use the BEST quality sausages... they make ALL the difference! 


MJ

Sunday 12 July 2020

Easiest Sourdough Waffles or Pancakes


Sunday mornings are slow and easy at our house. Inevitably, there is bacon or breakfast sausages from the St. Jacobs Farmers Market to cook up... and I’ve got the time to make a fresh fruit salad and these EASY sourdough pancakes or waffles while everything is sizzling on the stovetop.

This really is the easiest process... in fact, I barely look at the recipe these days!  I just toss everything in a bowl, mix it up, and cook them up in a pan or our awesome waffle maker.

If I’m building my starter for a sourdough bread bake, I usually have some leftover sourdough starter, but using an active starter isn’t even necessary.  I’ve made these with week old starter, and it turns out just fine every time!

This was leftover starter that had been fed and used a day or two before for making sourdough bread.  I purposely made extra so it could be used for our Sunday brunch.

See how happy and bubbly my Lizzie can be if she’s ready for both bread AND waffles or pancakes?

Either way, I use @bakewithjack’s scrapings method... after using almost all the starter, I immediately toss some bread flour into my container, stir and scrape all the dried bits down, add a splash of water, and mix well before placing it back into the fridge for the next time I need it.  


Now, let’s make our waffles or pancakes!

In a bowl, pour 1-2 cups of of sourdough starter, and add:
2 eggs
1 generous teaspoon of cinnamon (to taste)
1-2 Tbsp of sugar (to taste)
1 teaspoon of baking soda
1 rounded teaspoon of baking powder
2 swirls of avocado oil or equivalent (2 Tbsp) melted butter

Mix well... adding either water/milk or a little all purpose flour to achieve the perfect consistency.

I find pancakes need a thicker texture if you want that nice puffy result... and waffles need a runnier consistency which I achieve by adding an extra tablespoon of oil or butter so it doesn’t stick and it gets a bit crispier.

This is just right for waffles, but it needs to be a bit thicker for pancakes.
Here’s a picture of a bowl of banana pancakes that needed a little bit of extra flour.
See how happy she is after mixing?  Be sure to use the batter right away, for maximum lift!

Pour into a buttered pan for pancakes.

Flip when bubbles come up and they’re browned to your liking!

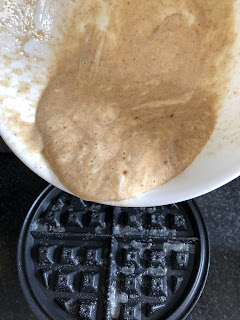
Or add to a heated (and buttered) waffle maker... it’s messy (if you’re like me) but it’s totally worth the effort!


Mmmm!

Mmmm!
I stack the finished waffles (or pancakes) in the oven set to 175 degrees Fahrenheit while I finish cooking up the batter.
These are just the right thickness!

Nice and puffy!  Perfect with berries and maple syrup!

See how happy these sourdough treats can make your loved ones?

Let me know if you try this recipe!  
Tag me @mjschropp on IG or FB!
Happy cooking!