
This post is the result of over two years of baking. My process is still evolving and my pictures are getting better and better (I think) but due to heavy (but lighthearted!) demand by my friends and family wanting to learn how to bake amazing sourdough bread, I have pushed myself to finally PUBLISH what I have. It is far from perfect and I still hope to add a few better quality pictures and mini videos of the process, but here it is... my long awaited post on this crazy passion of mine: ....baking delicious and nutritious sourdough bread. Enjoy!

I’ve been baking sourdough since January, 2018. It’s a slow process, and at first I thought that meant that I had to be there all the time to supervise it and make sure that it rose properly or didn’t over proof. However, after all this time, I have learned to SIMPLY TRUST the process. It does take time, but only a few minutes at a time. In fact, it’s mostly hands off... I can make this bread around my work day schedule or pandemic time at home... and there are great margins for both small learning errors AND limitless experimentation.

BUT IT’S ALL DELICIOUS!!

Have no fear! This is a FAST learning curve, so if you’re here to learn, get ready for some of the BEST BREAD you can make anywhere.... and it’s FUN and EASY to make!

You will need:
An active sourdough starter (50g)
Water (350g) or a bit extra water to combine, if your first mix is very dry
Bread Flour (500g)
Sea Salt (9g) or to taste

You’ll also need a digital scale that measures in grams (g)
A bowl, your hand, and / or a dough hook for mixing
A banneton or bowl for proofing your sourdough
A Dutch oven, cast iron pot with lid, or covered casserole dish

1. First, you’ll need a happy and active starter. Bake regularly and your starter will be happy... once a week is plenty. This is my starter after a morning feed... I came home from work and it was ready to go. See how happy it looks? A general rule is that it should at least double and be somewhat rounded at the top (not caving in or collapsing). The smell should be pleasant and like a good bread.


Click here for my post on the Care and Feeding of your Sourdough Starter:
2. Mix 50 grams of your bubbly starter into 350 grams of water.
It should look like this:

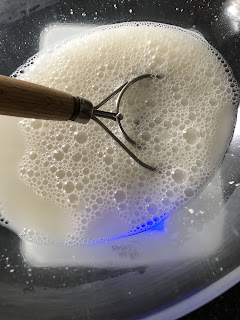
It should look like this:


3. Add 500 grams of strong unbleached bread flour. I usually include a good 15g of rye flour (or 15 g spelt) (or up to 50g whole wheat flour) in that 500g mix. Then add 9 grams of nice sea salt.


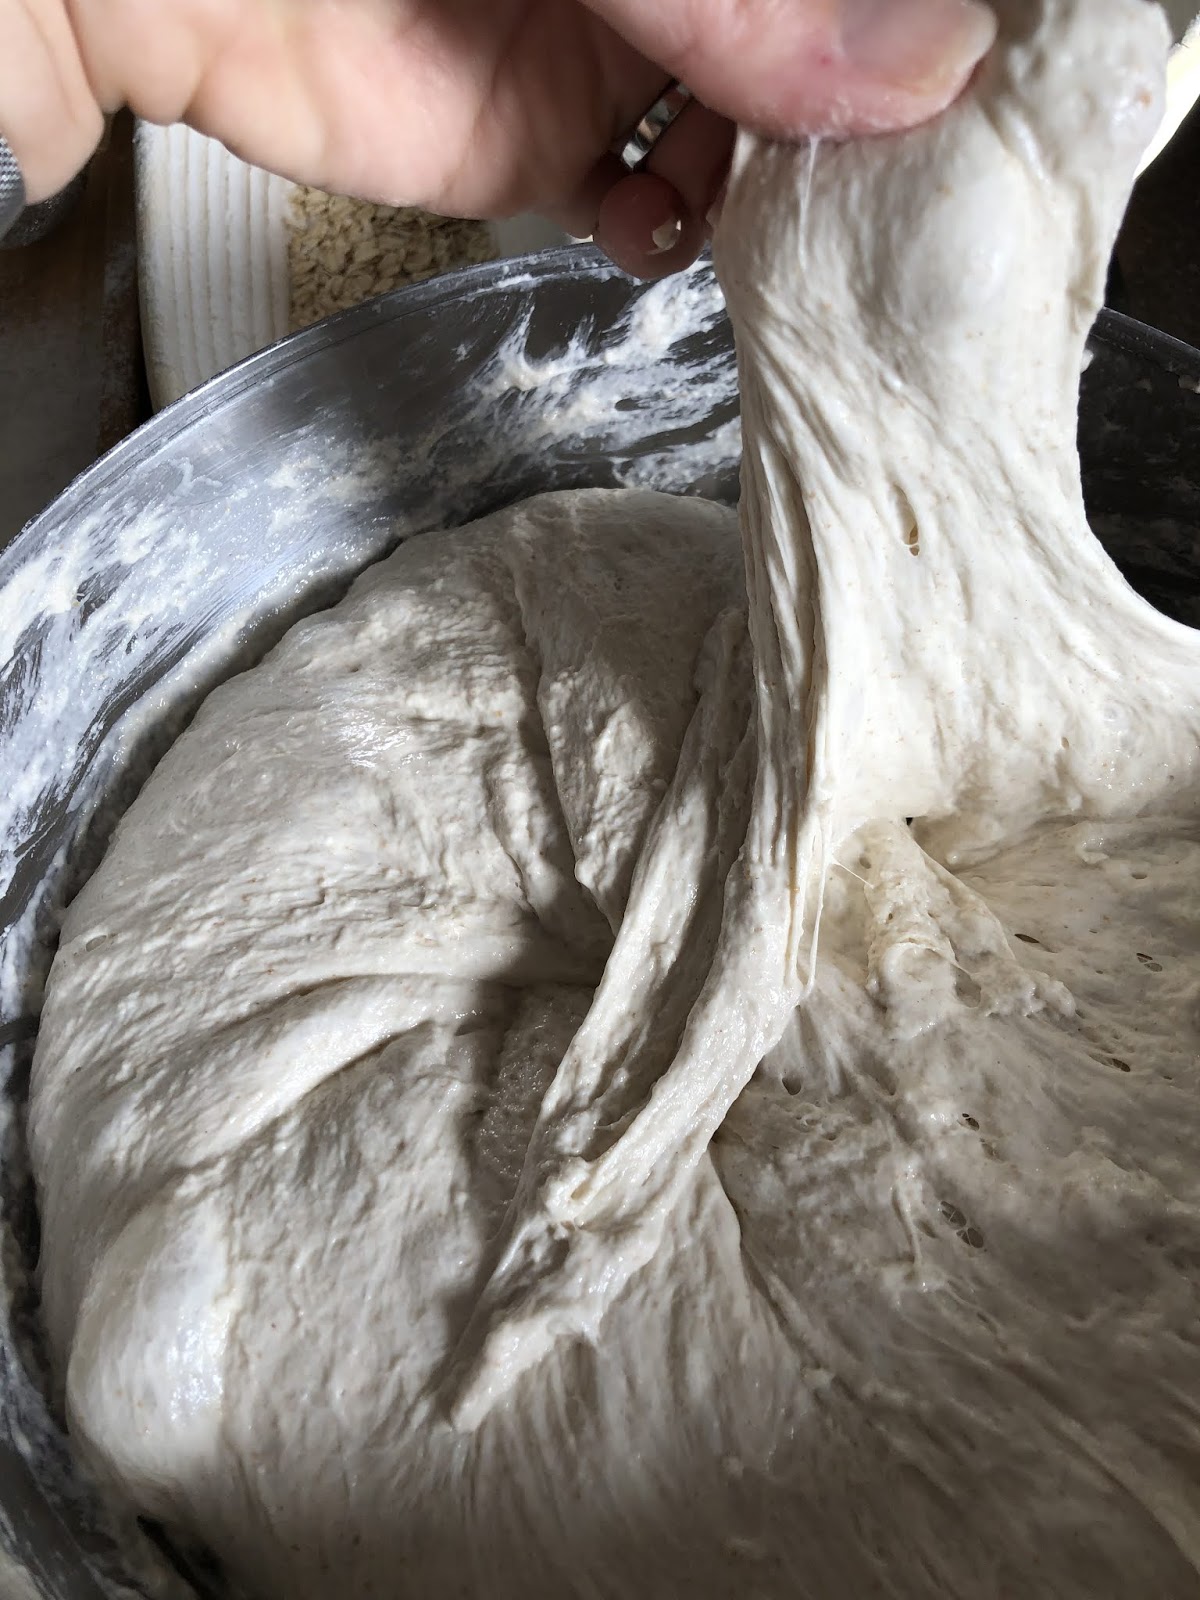
Please note: I am left handed, and therefore I move my pulls and turns in a clockwise direction. If you are right handed, you may find it feels more natural to pull and turn in a counter clockwise direction.
6. Repeat every half hour or so, and observe the changes in your dough. It should grow bouncier and puffier and softer with every pull and fold.
7. Leave (covered) on your counter overnight to continue proofing... it may look like this in the morning:

Or this:

Or this:
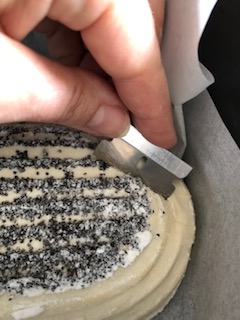
8. Prepare your banneton with a generous dusting of rice flour (or all purpose flour). Consider dusting it with a nice lining of poppyseeds or raw oats, for a novel crust. Give your dough one final series of pulls and turns and pop it into the prepared banneton. Chill, covered, for a minimum of 6 hours. Overnight is also fine, as the flavours will develop nicely over time while the fermentation process is slowed.


Be sure to make sure your loaf isn’t sticking to the sides of the banneton, cover it with parchment paper, hold tight, and then flip it into a COLD Dutch oven or covered casserole dish (2nd pic, below).


10. Now SLASH your loaf with a razor at a 45 degree angle, to allow for some expansion during baking, just ... GO FOR IT!


11. Cover your loaf with the Dutch oven’s lid, and place it into a COLD oven, THEN set it to 450 degrees Fahrenheit. Bake it, covered, for 40 minutes, then uncover it to reveal your sourdough loaf. Bake it about 15 or so minutes more, uncovered, until it gets as golden brown and crusty as you like.

12. Set it out on a rack to cool at least ONE HOUR before slicing, as it will continue to bake and crackle and sing. Try to resist the urge to slice into your sourdough bread while it’s hot, as it will ruin the nice crumb / texture of your loaf. After that, slather it with butter, and ENJOY!


Well that’s it, that’s my process.


Special thanks to @elaine_foodbod on Instagram for her tried and true master recipe (which I have slightly adapted for my kitchen and taste). Thank you, Elaine, for your enthusiasm and wholehearted support of us sourdough bakers around the world!
I get such a thrill every time she features my sourdough pics in her stories. Give Elaine a follow!

Thanks also to Ayers Bulk Foods and Baking Supplies for featuring my Homemade Sourdough Bread recipe here on Taste the Love! They’re my one stop shop for all things baking, from strong bread flour to rye, spelt, kamut, or whole wheat flours, to spices and other mix-ins such as sunflower or pumpkin seeds, to poppyseeds, oatmeal, and honey, candied citrine, or even the hard to find bannetons!

To my readers:
PLEASE DO let me know what you think of this post and my process in the comments below! I’m happy to answer any or all of your questions... I’ll even send you some of my dried starter, or help you troubleshoot if you run into any problems.

PLEASE DO let me know what you think of this post and my process in the comments below! I’m happy to answer any or all of your questions... I’ll even send you some of my dried starter, or help you troubleshoot if you run into any problems.
Also, DO follow me / like / comment / or tag me @mjschropp on Instagram / Facebook if you post your own sourdough bread creations.

Happy baking!!!
MJ
Hello MJ, I would love to make some sourdough! Can you help me with the starter? Thanks in advance.
ReplyDeleteHi! Sorry just seeing this! Do you still need some starter? I am happy to mail you some, just send me your mailing address via my mjschropp@gmail.com address
Delete