Saturday, 25 April 2020

Homemade Sourdough Bread


This post is the result of over two years of baking.  My process is still evolving and my pictures are getting better and better (I think) but due to heavy (but lighthearted!) demand by my friends and family wanting to learn how to bake amazing sourdough bread, I have pushed myself to finally PUBLISH what I have.  It is far from perfect and I still hope to add a few better quality pictures and mini videos of the process, but here it is... my long awaited post on this crazy passion of mine:  ....baking delicious and nutritious sourdough bread.  Enjoy!


I’ve been baking sourdough since January, 2018. It’s a slow process, and at first I thought that meant that I had to be there all the time to supervise it and make sure that it rose properly or didn’t over proof. However, after all this time, I have learned to SIMPLY TRUST the process.  It does take time, but only a few minutes at a time.  In fact, it’s mostly hands off... I can make this bread around my work day schedule or pandemic time at home... and there are great margins for both small learning errors AND limitless experimentation. 

BUT IT’S ALL DELICIOUS!!


Have no fear!  This is a FAST learning curve, so if you’re here to learn, get ready for some of the BEST BREAD you can make anywhere.... and it’s FUN and EASY to make!


You will need:

An active sourdough starter (50g)

Water (350g) or a bit extra water to combine, if your first mix is very dry
Bread Flour (500g)
Sea Salt (9g) or to taste


 You’ll also need a digital scale that measures in grams (g)
A bowl, your hand, and / or a dough hook for mixing
A banneton or bowl for proofing your sourdough
A Dutch oven, cast iron pot with lid, or covered casserole dish


1. First, you’ll need a happy and active starter.  Bake regularly and your starter will be happy... once a week is plenty.  This is my starter after a morning feed... I came home from work and it was ready to go.  See how happy it looks?  A general rule is that it should at least double and be somewhat rounded at the top (not caving in or collapsing).  The smell should be pleasant and like a good bread.


Click here for my post on the Care and Feeding of your Sourdough Starter:


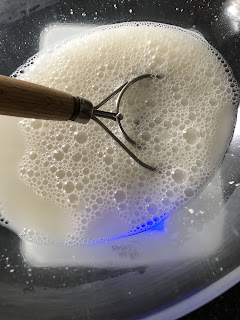
2. Mix 50 grams of your bubbly starter into 350 grams of water.
It should look like this:


3. Add 500 grams of strong unbleached bread flour.  I usually include a good 15g of rye flour (or 15 g spelt) (or up to 50g whole wheat flour) in that 500g mix. Then add 9 grams of nice sea salt. 


4. Mix until all the flour is absorbed by the water.  If it feels too dry, meaning you find some bits of flour that remain dry, feel free to add a splash of extra water - up to 20g, if needed.  It should look rough and a bit shaggy, like this plain mix (below) or seeded mix (2nd pic, below):


5. After about an hour (or at a convenient time for you) give it a twenty point turn, by pulling the outside of the dough to the centre of the dough.  This will ensure even fermenting temperature throughout the dough, and it will also start building structure into your dough, so it can hold its rounded shape.


Please note:  I am left handed, and therefore I move my pulls and turns in a clockwise direction.  If you are right handed, you may find it feels more natural to pull and turn in a counter clockwise direction.


6. Repeat every half hour or so, and observe the changes in your dough.  It should grow bouncier and puffier and softer with every pull and fold.

7.  Leave (covered) on your counter overnight to continue proofing... it may look like this in the morning:


Or this:


Or this:
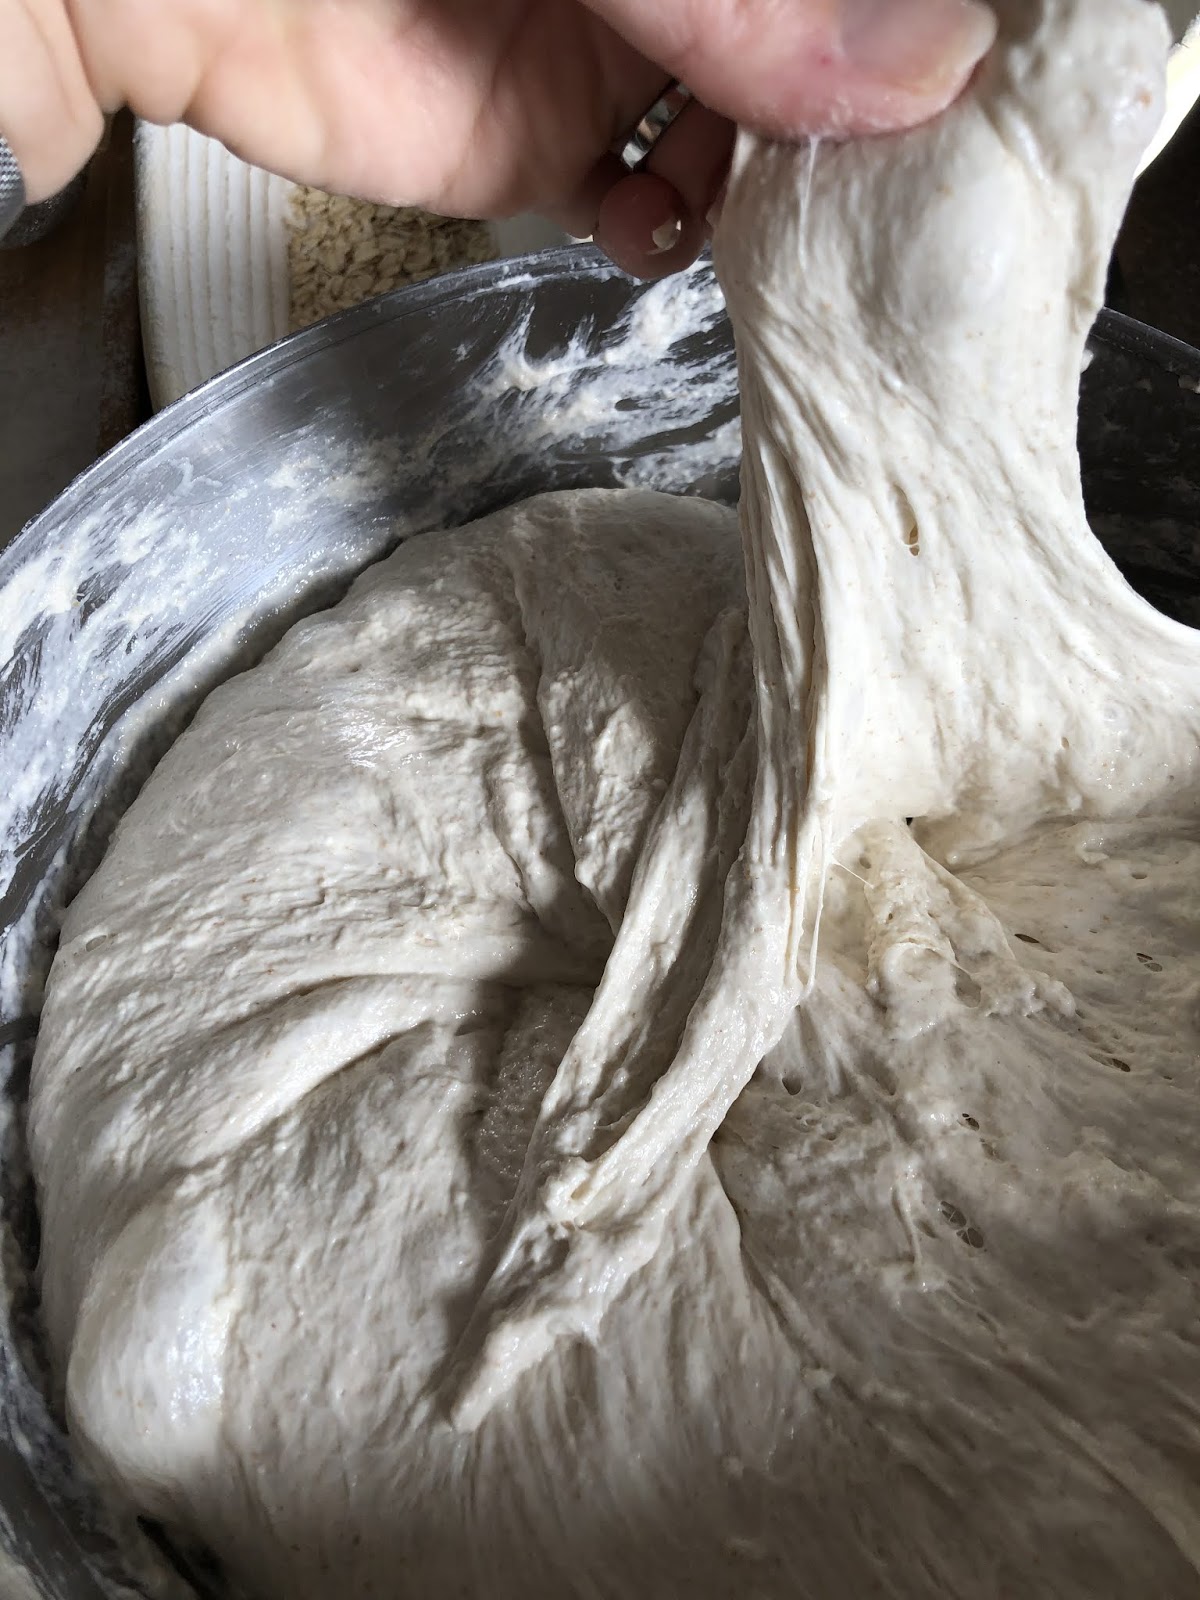


8.  Prepare your banneton with a generous dusting of rice flour (or all purpose flour).  Consider dusting it with a nice lining of poppyseeds or raw oats, for a novel crust. Give your dough one final series of pulls and turns and pop it into the prepared banneton.  Chill, covered, for a minimum of 6 hours.  Overnight is also fine, as the flavours will develop nicely over time while the fermentation process is slowed.  


9. In the morning, it should look like this when you get it out of the fridge and uncover it (below).  It is now ready for baking!  

Be sure to make sure your loaf isn’t sticking to the sides of the banneton, cover it with parchment paper, hold tight, and then flip it into a COLD Dutch oven or covered casserole dish (2nd pic, below).


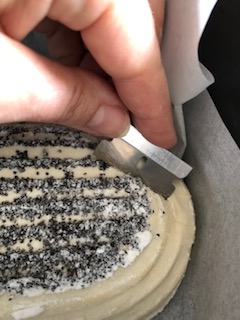
10. Now SLASH your loaf with a razor at a 45 degree angle, to allow for some expansion during baking, just ... GO FOR IT!


11.  Cover your loaf with the Dutch oven’s lid, and place it into a COLD oven, THEN set it to 450 degrees Fahrenheit.  Bake it, covered, for 40 minutes, then uncover it to reveal your sourdough loaf.  Bake it about 15 or so minutes more, uncovered, until it gets as golden brown and crusty as you like.


12. Set it out on a rack to cool at least ONE HOUR before slicing, as it will continue to bake and crackle and sing.  Try to resist the urge to slice into your sourdough bread while it’s hot, as it will ruin the nice crumb / texture of your loaf. After that, slather it with butter, and ENJOY!


13.  I leave mine uncovered on the counter for a day (if it lasts that long), so we can enjoy the crispy crust at its freshest... then I slice and freeze it the next morning.  It keeps very well in the freezer, in a freezer bag, although it never lasts long, because sourdough is just AMAZING toasted at any time of the day!


Well that’s it, that’s my process.  


DO keep a journal on how each loaf turns out, and see how you do over time, in your kitchen, on your schedule.  I’m still learning, and I love to experiment with different flours, types of slashing, and crusts... and so can you!


I’ll soon make another post on other things I make with my starter when I need to “discard” any of it... oh, but I don’t waste it at all, I make it into pancakes... or waffles... or savoury hotcakes.


And don’t even get me started on SOURDOUGH PIZZA!  Here’s the link to my post on Homemade Sourdough Skillet Pizza:


Special thanks to @elaine_foodbod on Instagram for her tried and true master recipe (which I have slightly adapted for my kitchen and taste).  Thank you, Elaine, for your enthusiasm and wholehearted support of us sourdough bakers around the world!  
I get such a thrill every time she features my sourdough pics in her stories. Give Elaine a follow!


Thanks also to Ayers Bulk Foods and Baking Supplies for featuring my Homemade Sourdough Bread recipe here on Taste the Love!  They’re my one stop shop for all things baking, from strong bread flour to rye, spelt, kamut, or whole wheat flours, to spices and other mix-ins such as sunflower or pumpkin seeds, to poppyseeds, oatmeal, and honey, candied citrine, or even the hard to find bannetons!

To my readers:
PLEASE DO let me know what you think of this post and my process in the comments below!  I’m happy to answer any or all of your questions... I’ll even send you some of my dried starter, or help you troubleshoot if you run into any problems.  

Also, DO follow me / like / comment / or tag me @mjschropp on Instagram / Facebook if you post your own sourdough bread creations.


Happy baking!!!
MJ


Saturday, 26 January 2019

Instant Pot Beef and Barley Soup

Instant Pot Beef and Barley Soup


This soup is essentially pure, whole, healthy, comfort food, and involves very little hands on work.  I have always loved to put a pot on and let it simmer all day on the stove, but I've been playing with my Instant Pot and the meat comes out so perfectly and consistently tender in very little time, it's becoming my new favourite way to make delectable soups and stews such as this one.

Ingredients:
Broth (recipe below - made with beef shank bones, ACV, and veggie scraps)
Stewing beef chunks
Onions
Garlic
Carrots
Can of dark ale (optional) - I used Waterloo Dark, but Guinness works well, too
Bay leaf
Salt and Pepper to taste
Pot barley
Parsley to finish

If I'm well prepared, I first make a simple broth.  I use this for many things, like drinking (for gut health), making simple sauces / deglazing a pan, or cooking mashed potatoes or rice or barley... or I use it as a clean and pure ingredient in this soup. If I'm pressed for time, I use a CLEAN purchased broth.

To make the bone broth:
In the instant pot with the wire rack, place some beef shank bones, salt and peppercorns (to taste), a whole onion (with the skin) cut in two, and any mix of frozen parsley and veggie tops and scrapings.  I add a tablespoon of apple cider vinegar, then cover well with water.  I like to make about 10 cups.  
Seal and set at 60 minutes on manual / high pressure.  Let it release naturally.  
Remove bones and freeze for a second use another time.  I always scoop out the marrow and enjoy it right away! Sieve and discard veggies. Use and store or freeze in glass jars, or as desired.

To make the beef and barley soup:
In the instant pot, use about 6-8 cups of broth, 1 large can of dark ale, two pounds of well seasoned stewing beef chunks, 2 medium chopped onions, 2-4 chopped carrots, and a bay leaf. 
Seal and set at 40 minutes on manual / high pressure.  Let it release naturally.

I cooked the pot barley in a pot on the stove this first time, because I hadn't cooked with it before.  I followed the instructions on the bag fairly closely, using 3 cups of bone broth, just under a cup of barley, salt and pepper, and a bay leaf.  It simmered (covered) about an hour and I simply added it to the soup once it was done.  

Next time, I will shorten the cook time in the IP by about 15 minutes and will simply add it in to finish with the soup.  I love the hands off nature of soup making in the instant pot... I don't go too far when I'm making it, because I don't like to leave things on when I'm out, so it's no trouble to set it and forget it, and then come back to it to add the finishing touches (like the pot barley).

This soup is perfect on a cold day, and it's simply delicious with a sprinkling of fresh parsley.
Let me know if you like this one... there'll be more soups to come.
Enjoy!

Thursday, 17 January 2019

Lebkuchen


Mom's Lebkuchen

Christmas isn't Christmas without this baked treat.  This is mom's doubled recipe, which she kindly tweaked for me, to make it taste like the original recipe, but without the nuts or nutmeg (I'm allergic). I've taken this recipe on for the last several years, and tweaked it a bit myself, by doubling the spices for extra intense flavour, and "lemonizing" the icing part... 
the bulk of it is ALL MOM'S GENIUSNESS.


In a very large bowl, hand mix the following and let rest overnight:
5 cups flour
2  1/3 cups sugar
½ cup molasses
1 cup liquid honey
½ tsp ground anise
½ tsp ground cardamom
½ tsp ground cloves
1 ½ tsp ground cinnamon
½ tsp ground ginger
½ tsp ground mace
2 tsp grated lemon peel
4 eggs
1 cup (or a whole small container) of candied mixed citrus peel (in the baking section, top shelf)

Optional: 
1 cup raisins, 1 cup slivered almonds  (we prefer ours just plain)

Next morning, add:
1 cup flour
1 ½ tsp baking ammonia (or 10 grams)
(this can be bought in specialty stores, like Vincenzos or even Central)

Press dough into a cookie sheet (about 1 ½ cm thick) and bake @ 350 F for 15-20 minutes.  I like it lumpy, lol.  Do NOT overbake!   Ice when it’s just out of the oven, slightly cooled (and next batch is in the oven) with:   1 ½ cups icing sugar, 1 ½ tsp lemon juice, ½ tsp lemon extract, and enough hot water to get a nice spreadable consistency.   I like my glaze extra lemony, so I eyeball it and don't use any water, only lemon juice and extra extract. 

Enjoy!!!